How to Open the Console in XCOM 2
In order to enter console commands in XCOM 2, you first need to enable the console. The way the console is enabled is different depending on whether you are launching XCOM 2 through Steam or not.
How to Enable the XCOM 2 Console on Steam
If you are playing XCOM 2 on Steam, follow these instructions to enable the console:
-
Open Steam
-
Go to your "Library"
-
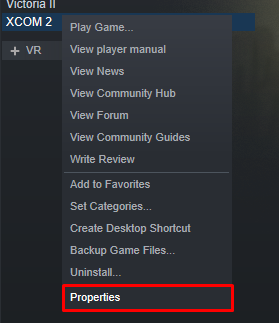
Right-click XCOM 2
-
Click and open "Properties"
-
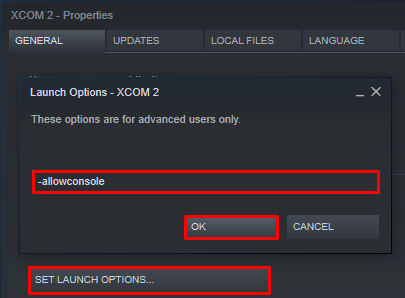
Click "Set Launch Options..."
-
Enter -allowconsole and press OK. If this does not work, try entering -allowconsole -log -autodebug.
The console is now enabled, and you can enter console commands. See How to Use the XCOM 2 Console for help entering commands.
How to Enable the XCOM 2 Console on non-Steam Games
On non-Steam versions of XCOM 2, follow these instructions on how to enable the console:
- Go to the location where you installed XCOM 2, which is usually C:\Program Files\XCOM 2 or C:\Program Files (x86)\XCOM 2.
- Navigate to the folder Binaries\Win64\Launcher
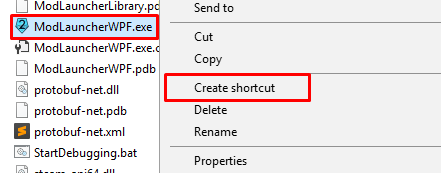
- In the folder, right-click ModLauncherWPF.exe and create a shortcut to the file.
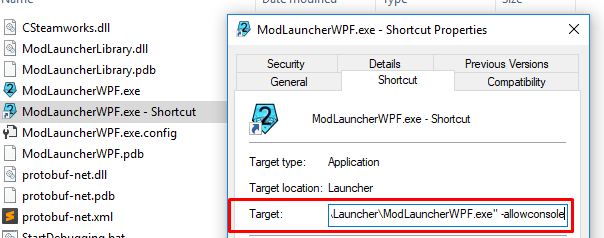
- After you create the shortcut, right-click the shortcut and click Properties.
- Add -allowconsole to the end of the target text box. Add a space before this. If this does not work, try entering -allowconsole -log -autodebug.
- Click Apply and close the Properties window.
- Launch XCOM 2 from your newly created shortcut.
The console is now enabled, and you can enter console commands. See How to Use the XCOM 2 Console for help entering commands.